Mix Tech Series Part 2: Equalization (Theory Basics And Studio Practices)
Theory basics, selected studio practices and a few pro-grade EQs to grab for free
Hey-day, Music Makers!
For those who’ve already read part 1 of my Mix Tech Series — “Levels & Panning” here we got the next stage of mixing process described in details and that is EQUALIZATION (for those who didn’t read Part 1 but still would like to here is the link.
To make reading and navigating the articles bit more comfortable, I will keep every article in this Series split into the following parts: # Intro # Theory # Studio Practices # Selected Free Tools.
#INTRO
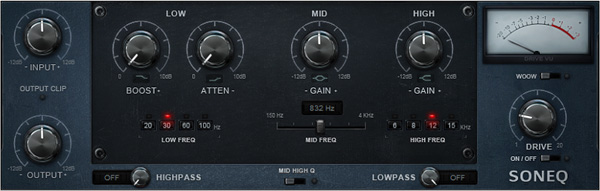
I’ve been meeting standard EQ classifications and descriptions (graphic, parametric, etc.) a thousand times here and there but never meet a detailed kind-of-application guide on what EQ design to use for what. One day I got lucky finally (fighting my seemed-to-be-never-ending-low-end-battle) re-reading one of the manuals (from Sonimus) and meeting the advice to try SonEQ on kick as its unique EQ design allows simultaneous boost and attenuation of the lows that brings a unique degree of sonic tweakability… Having tried that I got VERY impressed by the results and realised that knowing the manuals of my EQs in-and-out is MUST for those who wanna master the mixing tech professionally.
I’ve always been a “reading-the-manual-guy “— but guess you agree — learning mixing means hundreds of nuances to grasp so you may miss important things easily especially when you go self-educated…
At the end of the day, having read hundreds of pages on top of the thousands already read and spending extra time for testing and tweaking versatile commercial and free EQs I’ve compiled a kind of “functional EQ” overview I’d like to share but let’s dig some tech theory prior to that.
#THEORY:
Rod Elliot from Elliott Sound Products: “Equalization (EQ) is one of the most contentious areas of Hi-Fi. For years, it was expected of any preamplifier that it would have (at the minimum) bass and treble controls. There were untold variations of course, but the general scheme that ended up being used by almost all manufacturers was the ‘Baxandall’ topology, named after its inventor Peter J Baxandall.
This arrangement is used to this day, but for audio production purposes (as opposed to reproduction/replay of audio) the equalisation techniques available are far more complex.”
WIKI on equalizers: “The most common equalizers in music production are parametric, semi-parametric, graphic, peak, and program equalizers to adjust the timbre of individual instruments and voices by adjusting their frequency content and to fit individual instruments within the overall frequency spectrum of the mix.”
Following those basic WIKI definitions (even if it misses Hi Pass/Lo Pass Filters) and with semi-parametric and graphic EQs omitted as being mostly reproduction-related EQs, we have full parametric units being mostly used in sound production studios and that could be further split into sub-categories:
1. HI-PASS/ LO-PASS FILTERS: A high-pass filter is a filter that passes higher frequencies well but attenuates lower frequency components. A low-pass filter passes low-frequency components of signals while attenuating higher frequencies. In audio applications these are frequently termed “low cut” and “high cut” respectively, to emphasize their effect on the original signal.
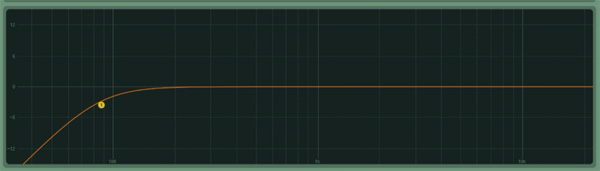 12 dB HI PASS FILTER (EQ 8)
2. PEAK / BELL EQs (with NOTCH shapes being the negative opposite with max Q values applied as a rule to make very narrow cuts when fighting resonating frequencies): boost/attenuate at the set frequency (“center frequency”) and a band of frequencies next to it
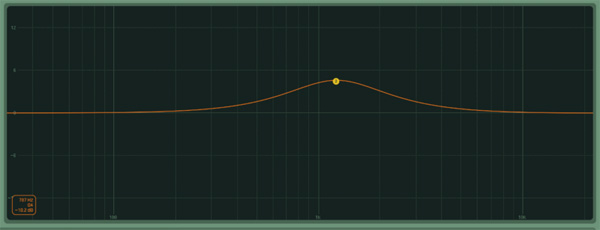 PEAK EQ (EQ8)
3. SHELF EQs: boost/attenuate energy at the set frequency and all audio frequencies above it (a high-frequency self) or all frequencies below it (a low-frequency shelf).
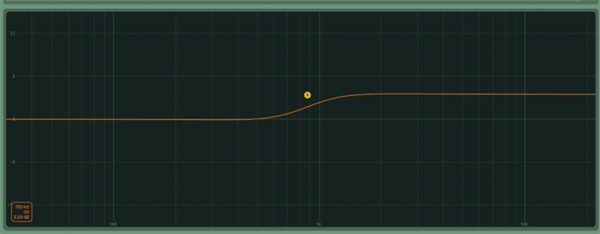 HI SHELF EQ (EQ 8)
4. PROGRAM EQ: Program EQ implies for program material, meaning the whole mix. Unlike channel EQ, which are good for sculpting, program EQ are usually designed for overall tone balancing and control
MAJOR Q (bandwidth) DEFINITIONS: 0.667= 2 Octaves (here’s wy we got Live’s default Q set as 0.71), 1.044 = 1 1/3 Octaves, 1.414 = 1 Octave, 2.871 = 1/2 Octave
FREQUENCY RANGE WE WORK WITH. As you know 20 Hz — 20 kHz range considered as an audible range of human hearing (guess you didn’t know that majority of people after 25 years do not hear beyond 16K) and we are most sensitive to 2–6K range sounds. The range of special interest for us from mixing perspective is from 100 Hz to 14 K — average range delivered by cheap multimedia speakers.
FREQUENCY BANDS. There are multiple approaches to the subject in the industry:
ISO standard says: SUB<60Hz, BASS>60<260Hz, MID>260 Hz<2K, HI-MID>2K < 6K, HI > 6K
IZOTOPE engineers go for: LOW END < 125 Hz, LO-MID >125<500 Hz, MID >500<2K, HI-MID >2<8K
RICK SNOMAN (“Dance Music Production” title’s author) votes for: SUB <50 Hz, BASS>50<250 Hz, MID MUD > 250 < 800 Hz, TRUE MID > 800 < 5 K, HI >5 < 8K, HI-HI > 8 K (I’M BIG “MID MUD” FAN)
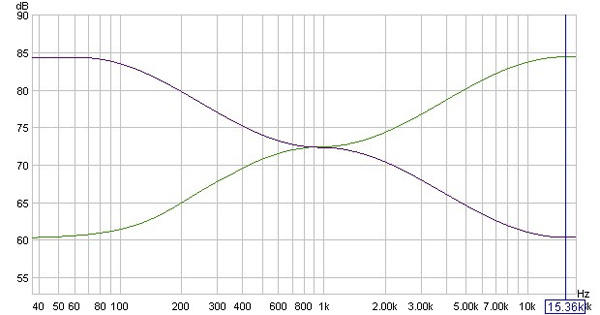
Whatever concept you choose, I do recommend you staying with notes/octaves logic, not frequency digits (guess you know that Live’s Spectrum has 2 major modes — Log Scale and Octaves, so make a proper use of it).
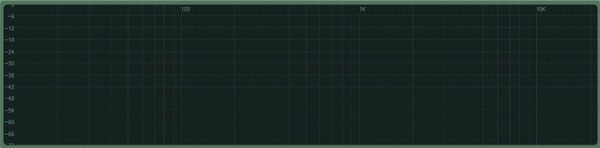 SPECTRUM LOG
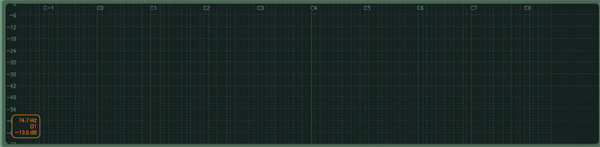 SPECTRUM OCTAVES
These are some major theoretical inputs to understand the general “EQ picture” a bit better. Again, as practice makes perfect let’s recollect — what do we use equalization for? I would underline two major areas standing out both historically and by functionality:
> AUDIO CORRECTION TASKS (when we CUT/ATTENUATE)
> AUDIO ENHANCEMENT TASKS (when we BOOST)
Some good advices from Recording Engineers’ Quaterly on practical applications of PEAK and SHELF curves below:
- Shelf equalizers are good for general tone changes in the bottom or top three octaves of the audio frequencies. Thus a low-frequency shelf control could be used effectively at 320 Hz or below and a high frequency shelf control at 2500 Hz or higher
- Shelf equalizers are best used for reducing rather than boosting . The very top octave (10 kHz — 20 kHz) often has more noise component (hiss) than useful sound. The same is true for the lowest octave (20 Hz to 40 Hz) except the noise is rumble rather than hiss. When boosting for general increase in brightness or general increase in bass, use a peak equalizer, e.g for general increase in brightness, boost 5 kHz with a 2 octave bandwidth (Q= 0.7), for general increase in bass, boost 80 Hz with a two octave bandwidth (Q=0.7).
- The Q setting of 1.0 (1 1/3 octaves), some engineers call the “Magic Q”. In general this is a bandwidth that matches how the different instruments cover the different frequency ranges of audio. For more percussive instruments (such as drums), you can narrow the bandwidth with Q settings as high as about 2.8. For more melodic instruments, such as voices and stringed instruments, you can broaden the bandwidth down with Q settings as low as 0.7 (again, our default setting in Live)
- Rule of thumb — boost less, attenuate more. The ear is accustomed to hearing reduction in energy in a band (due to sound-absorbing material for instance), thus the ear will hear a boost easier than a cut (a reduction). In general, a 6 dB boost is about as apparent as a 9 dB reduction. When equalizing during mixing try to reduce unwanted frequencies more than you boost desired frequencies. This will result in “clarity” with less “falseness” to the sound. If you look at a console after a mix that has been done by an experienced engineer, you will find much more reduction than boosting.
Equalization is all too often misused to compensate for poor levels. If you find yourself trying to boost > 6 dB, investigate the case to check if readjustment of levels could help, reducing the amount of boost at the equalizer.
Training hint: I recommend to someone new to use the “6 dB rule” – Never, while recording or mixing, boost more than 6 dB with the equalizer, period. At least for the first 50 mixes you do”.
#SOME STUDIO PRACTICES THAT WORK
1. Stability of your DAW is a top priority, be it you doing studio tasks only of performing LIVE in the future. Believe the guy having more than 300 letters from Ableton Headquarters technicians in his inbox, surviving dozens and dozens and dozens of crashes through the years (yep, with legit software). What’s the point here? Well — in 90–95% of the cases the crashes have been caused by 3rd party VSTs.
2. Having gained tons of negative experience I’m staying with EQ3 and EQ8 as leading workhorses, provided that fantastic 9.5 improvements make the mixing routine more and more comfortable (SVF filters, fantastic multi-sized spectrum window added on top of his 8 Bands, Adaptive Q and Oversampling options just making me nuts). For the majority of the tasks I’m keeping them both in No-Flat, No-Oversampling modes with EQ8 Spectrum switched off by Default, but when used on Groups/Busses with lots of MID/HI content — I activate Oversampling (2x) and it does sound more natural that way burdening CPU bit heavier that’s pretty fair.
3. Still there are tools I’ve been lucky to pick up on the way with some truly unique sonic characteristics Live could hardly beat at present (even if could emulate some of them like TILT EQ curves nicely) so these are the guys selected and kept in my VST folder (with some deleted and re-installed again in a while as it really takes some effort to reveal their capabilities) — I describe them in details in # SELECTED FREE TOOLS section.
4 From ROUTING point of view I split my EQs into the following sub-groups (guess it’s clear that in 99% of the cases we go inserts, even if BARK of THE DOG got dry/wet knob):
– CHANNEL EQs > vast array of sculpting tasks
– GROUP/BUS EQs > multiple functions here — from cutting resonances to extra Mid/Side tweaking, adding coloration, etc.)
– MASTER BUS EQs (obviously it should be used at Mastering stage for fine-tuning of the mix’s tonal balance according to reference tracks we selected)
5. As already mentioned, even if we should be mostly cutting, nothing should keep you from boost experiments. Bear in mind though, that the second section of that rule says that we boost wide and cut narrow. Remember to keep an eye open on Gain section of your EQs before and after equalization not to make the change in apparent loudness fool you — as normally our ears perceive the louder signal as “better” (Free G meter inserted after the EQ will help you to stay unbiased).
We will be talking about the Universe of compressors in the next article, but as it’s tightly interconnected I will put it here: Whatever the point of views may be I do recommend you to follow this route:
FIRST WE CUT. THEN WE COMPRESS. ONLY AFTER THAT WE BOOST
#SELECTED FREE TOOLS I RECOMMEND TRYING
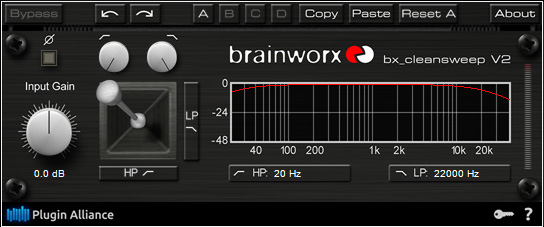
bx_cleansweep v2
Soft Hi-Pass/Lo-Pass filter: bx_cleansweep (with its proprietary algorithms providing smooth 6 dB slopes that compliment 12- 24dB/48dB slopes of EQ3 & EQ8 nicely)
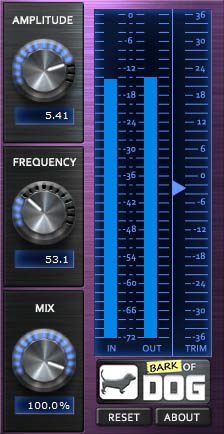
Bark Of A Dog
Resonant Hi-pass filter with a twist: Bark Of A Dog By Boz Digital Labs (yep I know that we may get this kind of performance with EQ8) but just look through the Users feedback, and believe me, this team knows their job just freaking well.
A quote: The description of this plugin as “… a way to boost the low end while still keeping it under control” is exactly how this plugin works. But the description sells itself very short as to the it’s incredible usefulness with it’s simplistic elegance and it’s smooth yet tight character. I tried it initially simply as a matter of curiosity. Now I have this plugin on almost every channel be it for the Mix or the Master. So when you need an EQ to accent the kick fundamental keeping the levels under control with proper amount of fullness added – look no further.
SonEQ
SonEQ by Sonimus — considered to be the best free PULTEQ emulation on themarket. PULTEQ EQs are program EQs based on Pultec EQP-1A concept —its ability to boost and cut adjacent frequencies simultaneously, thereby creating a resonant shelf. Still rather than emulating any specific piece of hardware, it’s inspired by elements of a few classic EQs, bringing them together, Frankenstein-style, in one interface.The models in question are the Pultec EQP-1A, Manley Massive Passive, API 550B and Neve 1073.
It sounds fantastic on drum loops…
And it seems that Mike Senior – hasn’t been charging for writing a feedback on SoneqPro after spending some time with free Soneq Free: but paid kinda 50 bucks and purchase it instead. Read more.
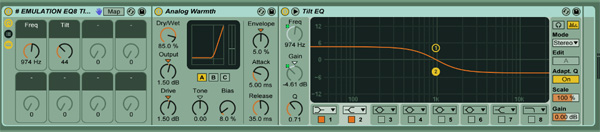
Tilt EQ
Tilt EQs – even if some say that the concept has been introduced by mistake and nearly nobody remembers and uses it – I do recommend you to try it. It’s a very nice emulation created by SIDEBRAIN (I took M/S chains out to simplify the rack a bit). It reminds of a Shelf EQ to certain extent but with a twist, Tilt EQ attenuate when gently boosting simultaneously, it’s like 2 shelf EQ working in the opposite directions (very smooth slopes here 3–6 dB per Octave but in some cases it may be 1dB(!) only when it gently boosts.
It has a lot of common with Shelf EQs, but just try in on low-wide-range stereo pads, synths or leads and you will feel the difference (Softube charges 99 USD for their Tonelux TILT EQ that means it’s value is identical to the Cytomic’s GLUE)
basiQ
Baxandall EQs – originally designed by legendary Peter Baxandall, these are the world’s most popular EQ curves for a reason: they are able to improve the sound of anything you throw at them. At the heart of this stereo unit are gently sweeping treble and bass EQ shelves (the Baxandall Curves) that give you subtle yet profound control over wide sections of the spectrum. The opposite of a surgical tool, the basiQ is all about sweetening sounds with broad, musical adjustments.
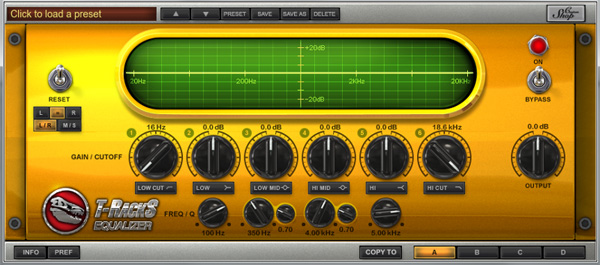
Mastering (program) EQs
Voxengo Marvel GEQ (even if it’s graphic) + you may also try Voxengo Overtone GEQ (with harmonic enhancer on board).
IK Multimedia should still have their great-sounding Classic EQ (that fits basic mastering needs nicely) distributed for free as a part of T-RACKS pack, so check it out and if yes – I do recommend you to give it a listen as well.
So these are EQ guidelines to follow, believe they will be of use.
Walk. And Ye Shall Reach.
Written by: Andrey Romanenko (Kiev, Ukraine)
2016 @ Copyright. All Rights Reserved