How to Make Future Bass in Ableton Live

In this tutorial, we’ll show you how to make the key elements of a Future Bass style track (drums, chords, melodies) and share some essential tips along the way. We won’t be diving too deep into the mixing or sound design aspects – as that is a bit too broad for one blog post.
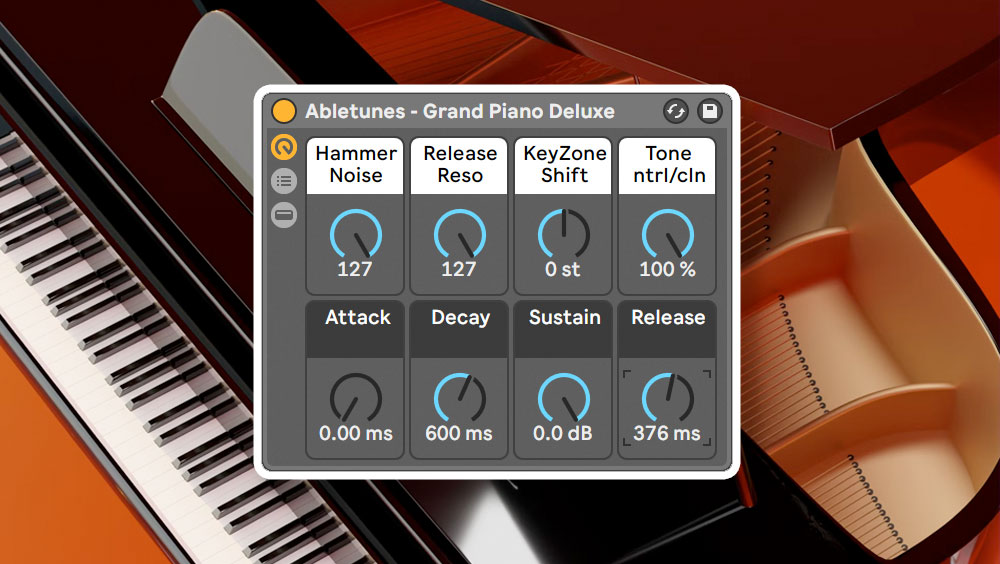
For all of the instrument tracks, we used synth presets found in our “Future Bass Essentials” Sylenth1 presets bank. To speed things up, these are already processed and sound pretty great without much additional effort.
Here is how the final result sounds:
BPM: 160 (80)
Time signature 4/4
STEP 01 – Kick Drum
Usually, we start creating a new track by choosing the right Kick Drum. You can find a various array of kicks in modern future bass tracks – soft, snappy and those that even sound “live”. This is a synth-heavy track, so we used short and punchy sample (also with a sharp attack so it will definitely cut well through the mix).
In this example, we have a basic Hip-Hop pattern:
We’ve used a nice sounding sample, so let’s keep it the way it is without any additional processing.
Here’s how that sounds:
STEP 02 – Clap
The next step is layered clap that will play a basic pattern – hits on the second and fourth beats. We’ve used a simple clap loop that has already been mixed with some snare.
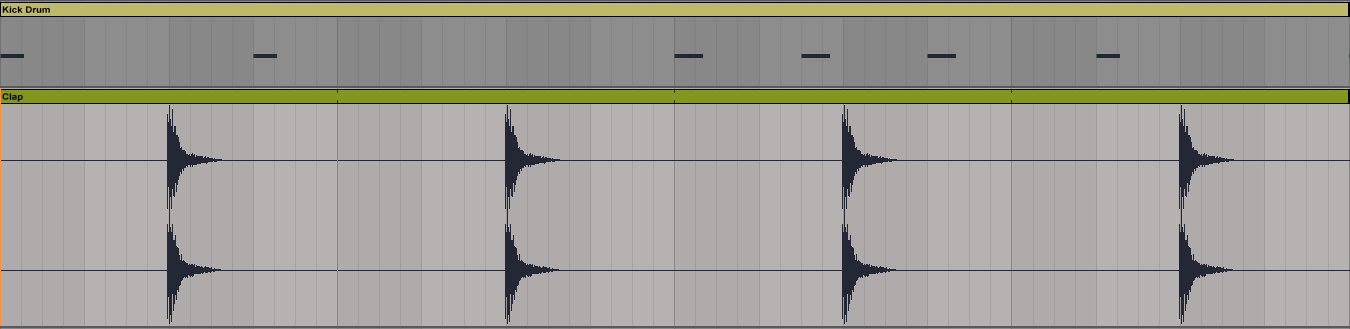
As you see, it is positioned very slightly off-grid to add some groove and “live” feel.
STEP 03 – Hi Hats
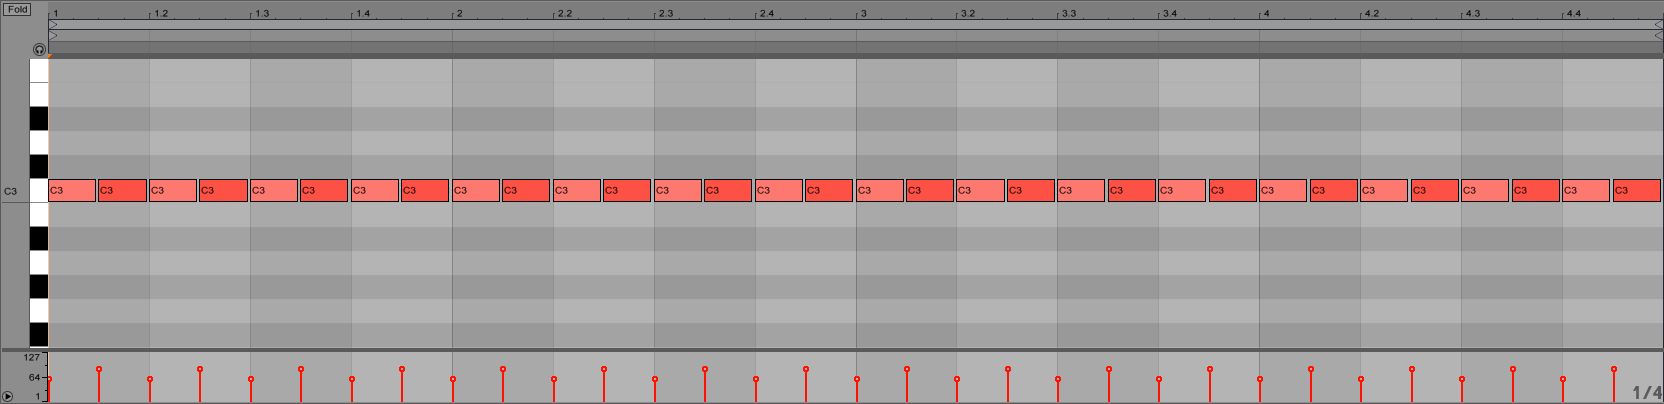
Our beat contains two hi-hat tracks that each play slightly different patterns. HiHat 01 has a basic 16th-note pattern (with velocity-forced volume variations) to give the pattern some life and groove.
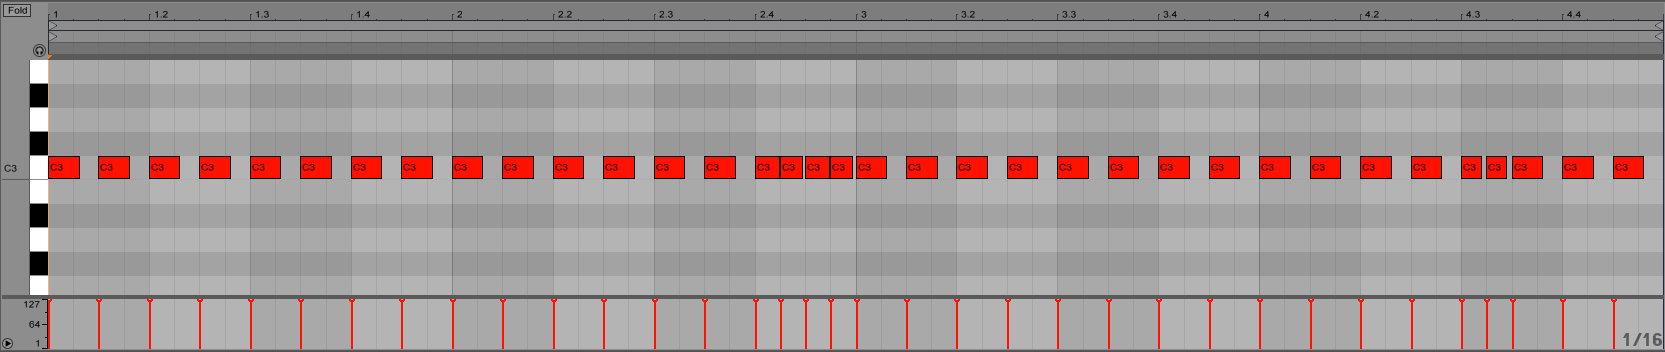
HiHat 02 is a processed TR-808 sample that plays the same 16th-note pattern as 01, but without any velocity variations and some Trap-style rolls that add accent every so often. Note that we’ve made this track a bit louder than HiHat 01, since it carries more interest and groove. In this instance, HiHat 01 is used to add the texture and fill out the beat.
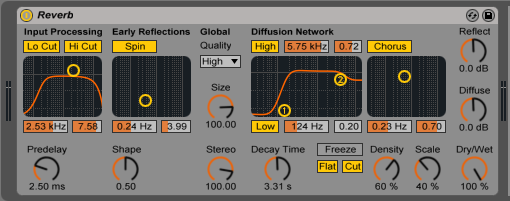
STEP 04 – Clap Reverb
We’ve duplicated the Clap track and set its Reverb to 100% Wet. The result is a huge reverb tail that we’re using to make a big, dramatic effect on the beat.
STEP 05 – Toms
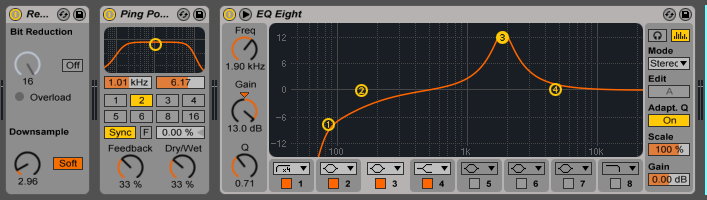
The final element of the beat is a Tom Fill that we’ve made using a simple tom sample and descending pattern.
Redux is used to add some some brightness. By applying some PingPong delay, the toms become wider and extra movement is introduced. Finally, we used EQ8 to make the combined sound a bit brighter and to add additional overall character.
Here is how all of that sounds together:
And this is what the full beat sounds like:
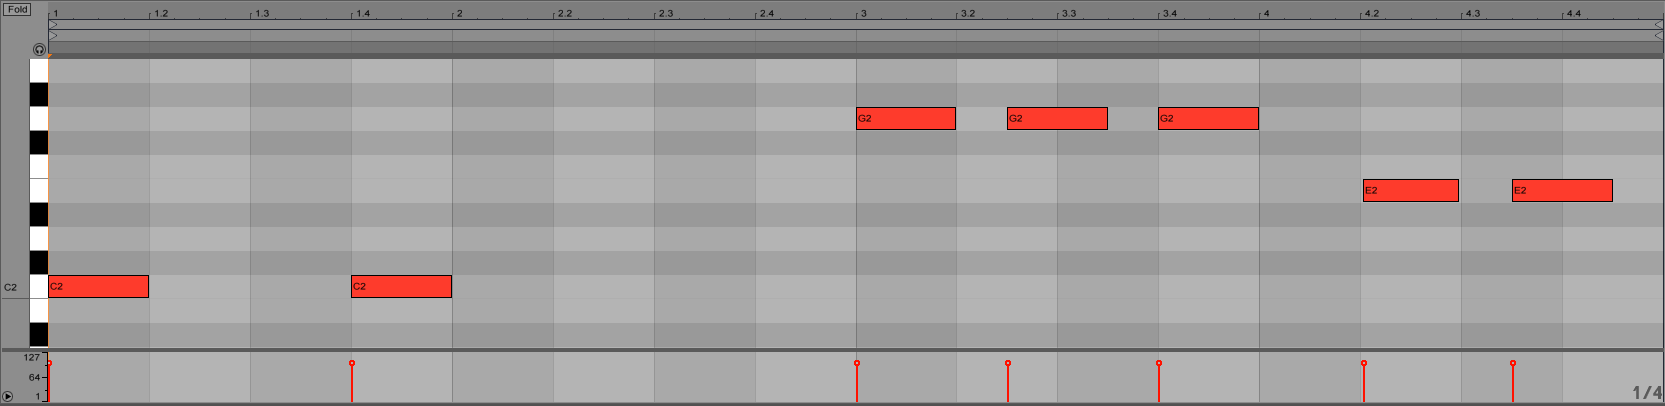
STEP 06 – Bassline
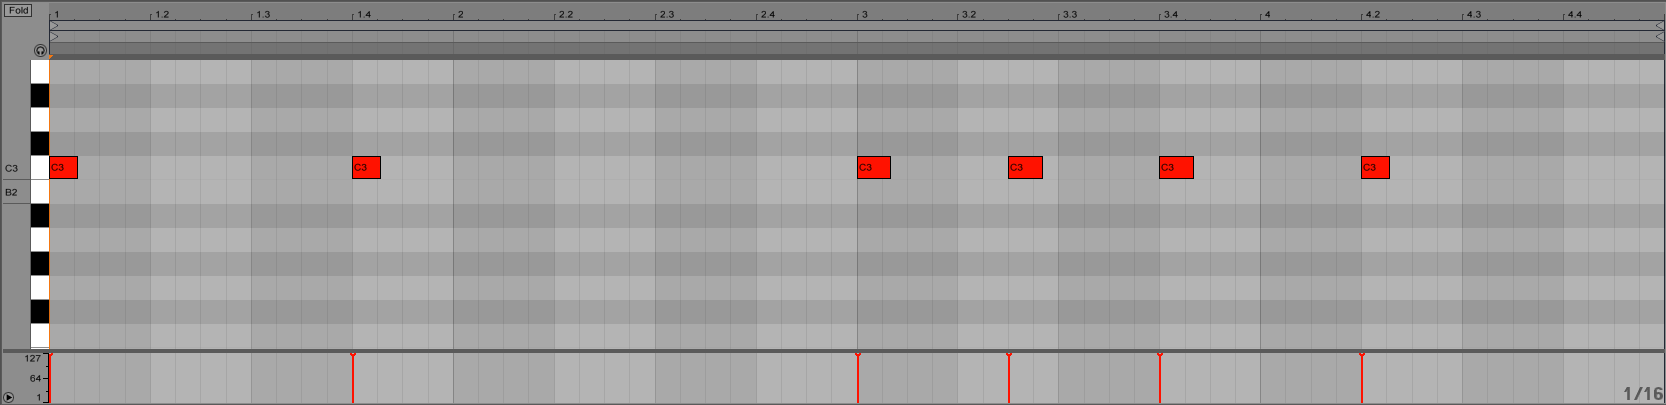
We started with a very simple melody in the key of C.

For this specific bass sound, we used a Sylenth1 preset that has a rich mid-range timbre.
From here, we simply shorten the individual bass notes and copy them (following the Kick Drum pattern). We also copied the ending F note to make the melody sound “complete” and to give it a resolve. By using shorter MIDI notes, we’ve made the overall phrase more dynamic.
Here is how that sounds:
We’ve decided to make a separate sub bass track (to have better low end control). Here, we’ve reused the main bass melody.
The final bass sound consists of two layers – the Sub layer to apply more weight, and the Mid layer to fill our low-mid frequencies (and to add some additional texture). In order to make a bit more room for the Sub layer, we’ve removed the lower frequencies on our Mid layer with EQ8. Having a separate Sub bass track is extremely handy since you can easily micro-control your low end by simply adjusting the sub bass volume.
Both tracks have sidechain compression that is triggered by a SC Impulse track. We’ve used a short noise hit that has the same pattern as our kick drum.
And here is how it sounds together with the beat:
Now the Kick drum has much more impact, weight and pressure.
STEP 07 – Chords
We’ll try to describe this part as simply as possible without going too deep into music theory.
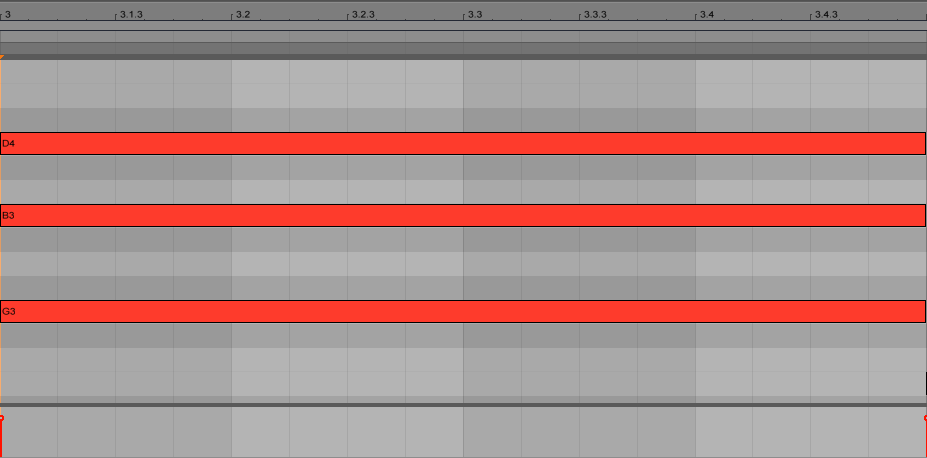
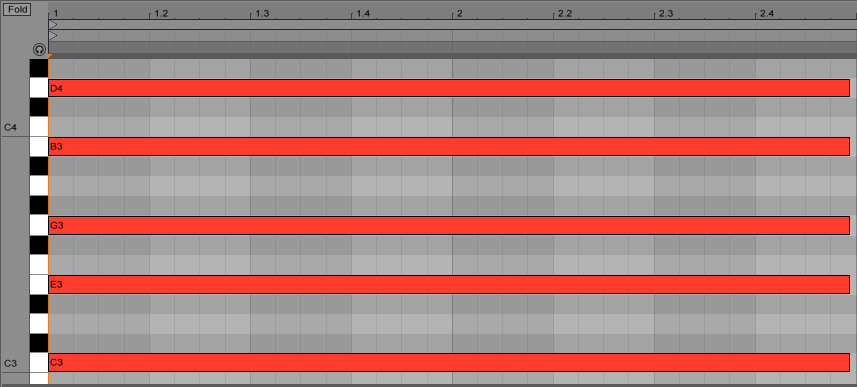
The Bassline melody will serve as a “basement” for our Chords pattern. For the first chord, we’ve simply built a C major triad chord from the C key. You can find all triads here.
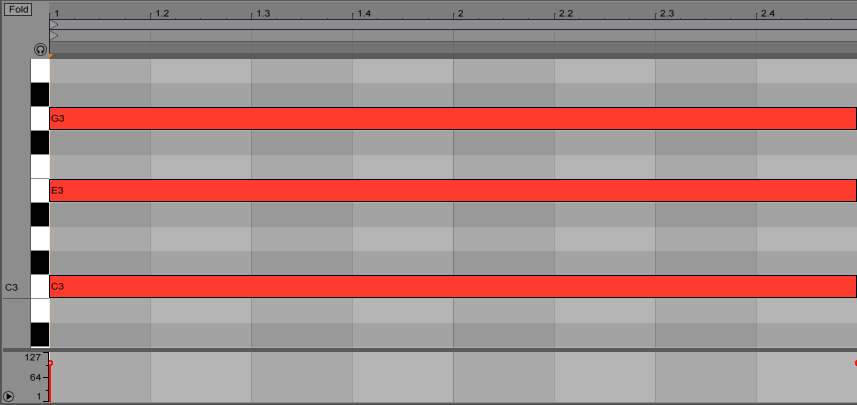
Then, we selected the entire chord and copied it above, overlapping the high (G) note of our initial chord.
This is what we have:
By applying this trick, it sounds much more full and rich. This is a very simple (but invaluably useful) technique for those of you who aren’t familiar with music theory. This can be done with ANY chord to get a fuller and larger sounding result that will always stay in key. Basically, with this trick – you get a set of notes with which you can play moving, or duplicating octaves to add upper or lower tones.
In the next steps, you’ll see how playing around with different notes and octaves using this technique you can achieve more “complex” chords.
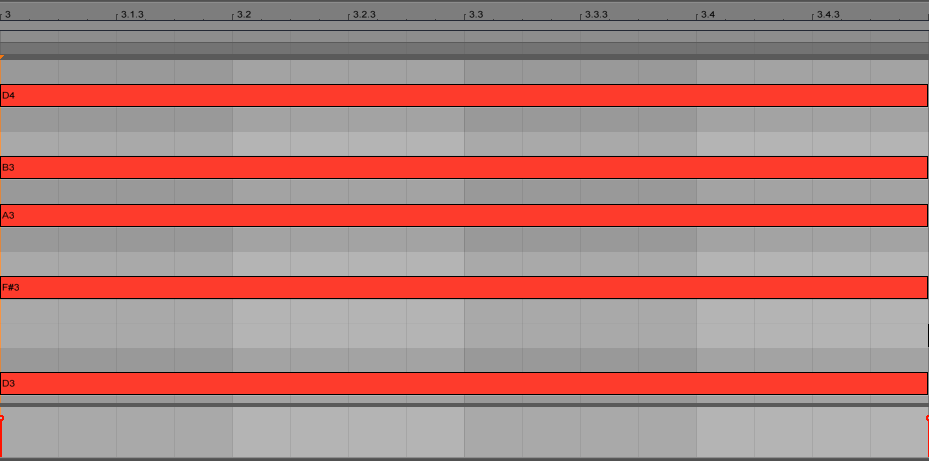
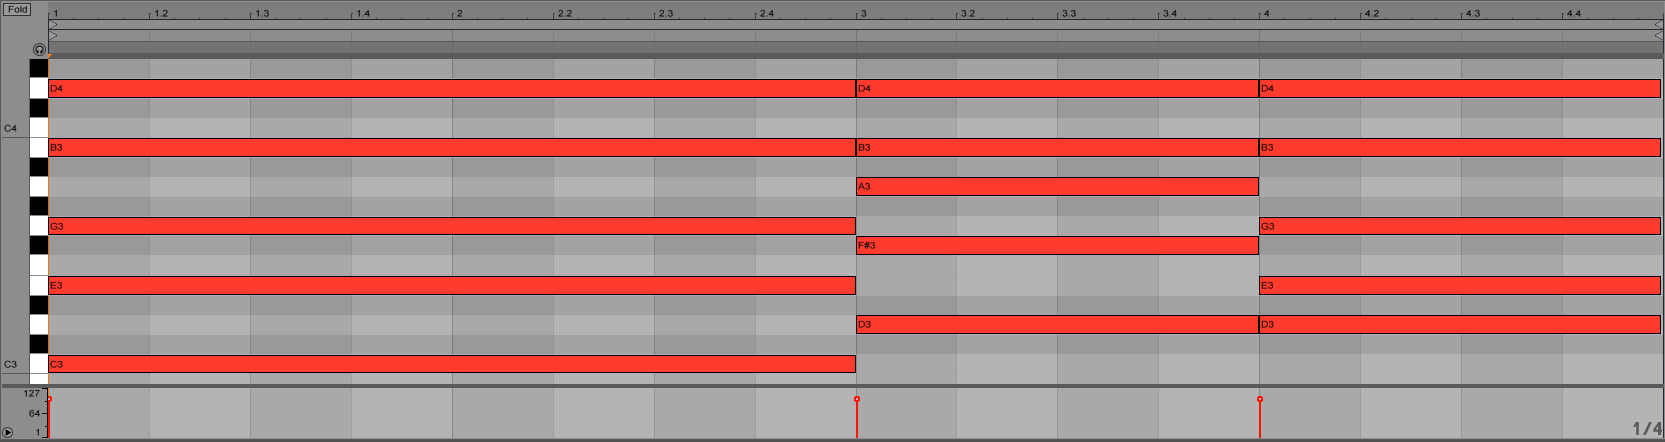
Just like the first, we’ve built our second chord from the key of G (following the bass melody) – a G major triad.
And we’re using the same trick – copy the chord above it, and overlap the high (D) note.
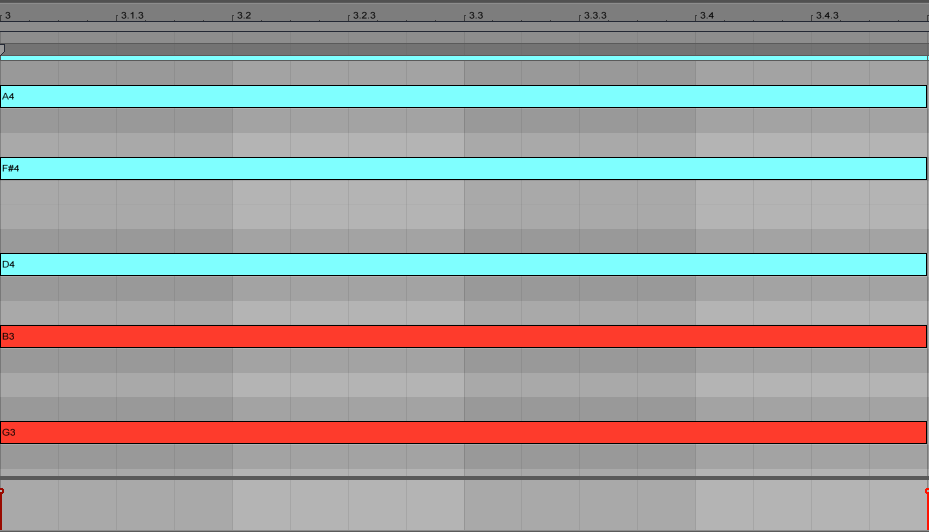
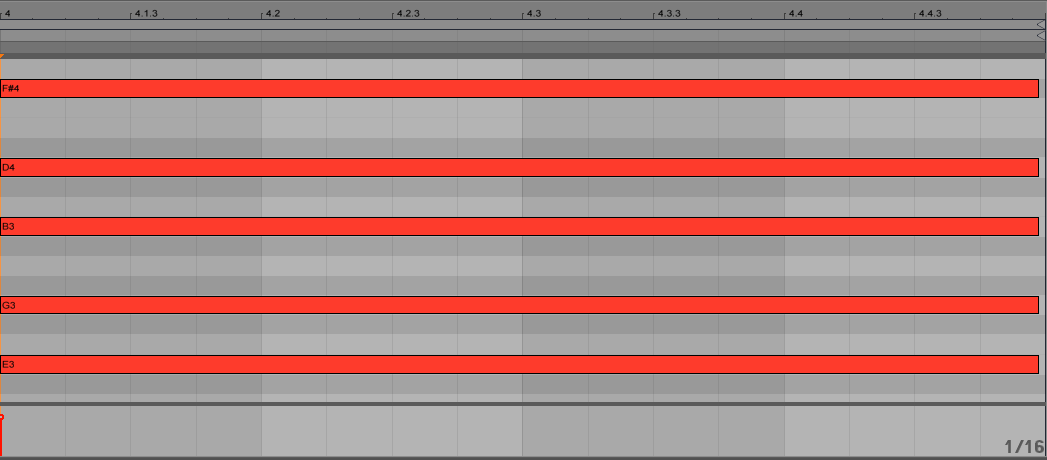
Here is the result:
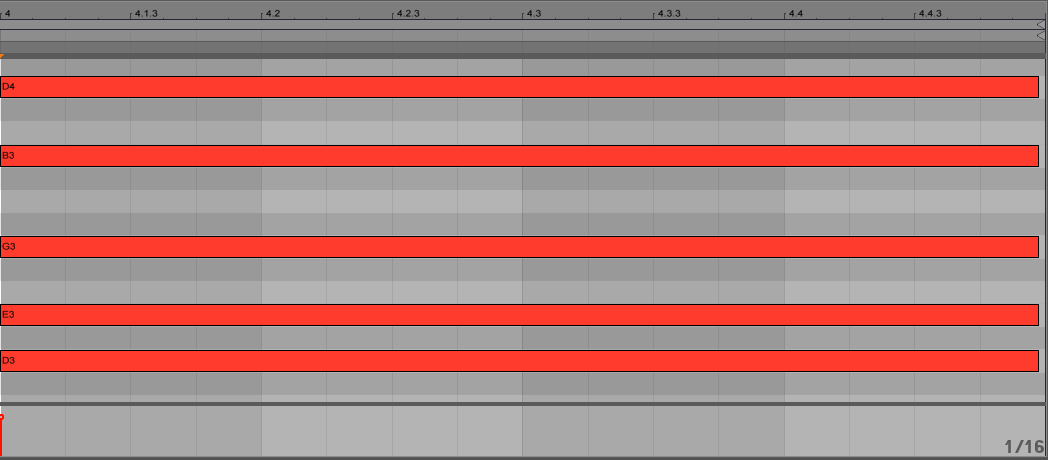
As you can hear, it sounds a bit too “high” – so we moved the two upper note (A and F#) octaves down.
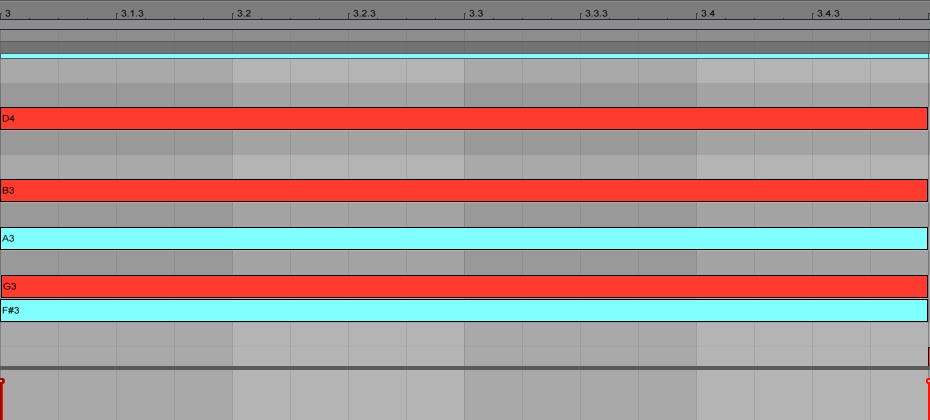
Then, we duplicated the D note octave down (to achieve a lower tone) and deleted the G key. We preferred how this particular chord sounds without it. Remember to rely on your ears and your own personal tastes when making decisions as such.
Here is what we got:
While playing around with different chords, we decided to make our last chord in a minor key. We’ve now added a basic E minor triad chord.
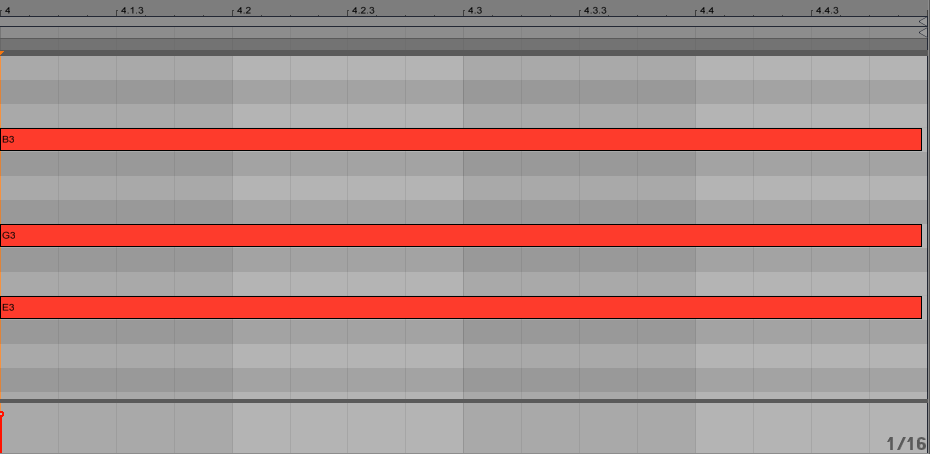
Again, we’ve copied it above, overlapping the high (B) note.
…removed the F# (since it sounds a bit too shrill and copied the D note octave down to add some lower tones).
Here is how all of that sounds:
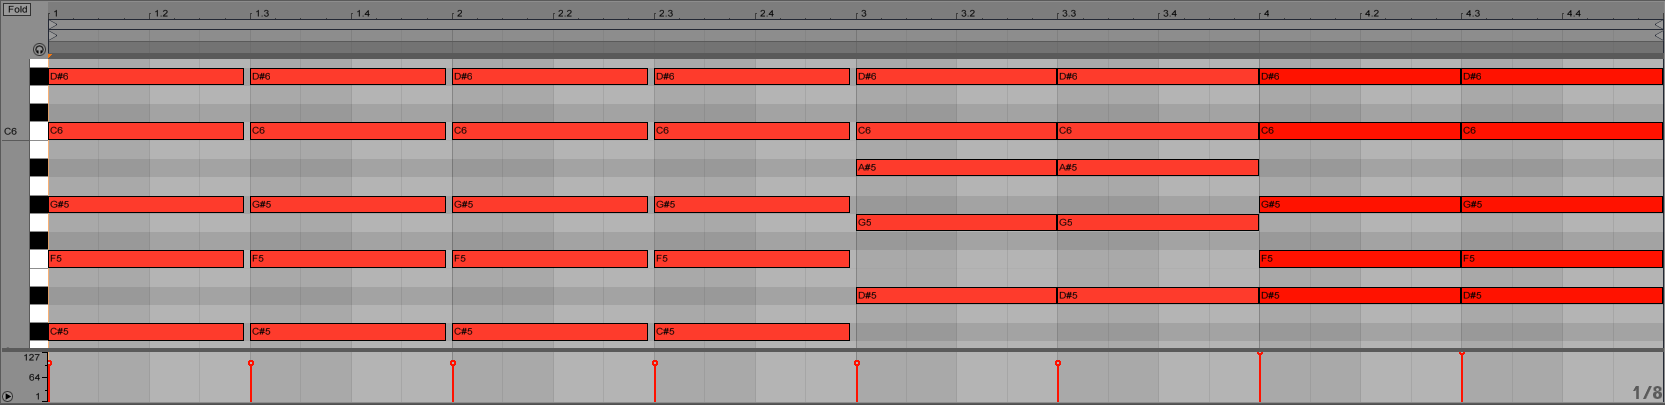
In this example, we tried to keep all of the chords on the same octave – achieving a solid and massive effect on the overall melody.
Here is how the harmony appears in full:
…and how it sounds:
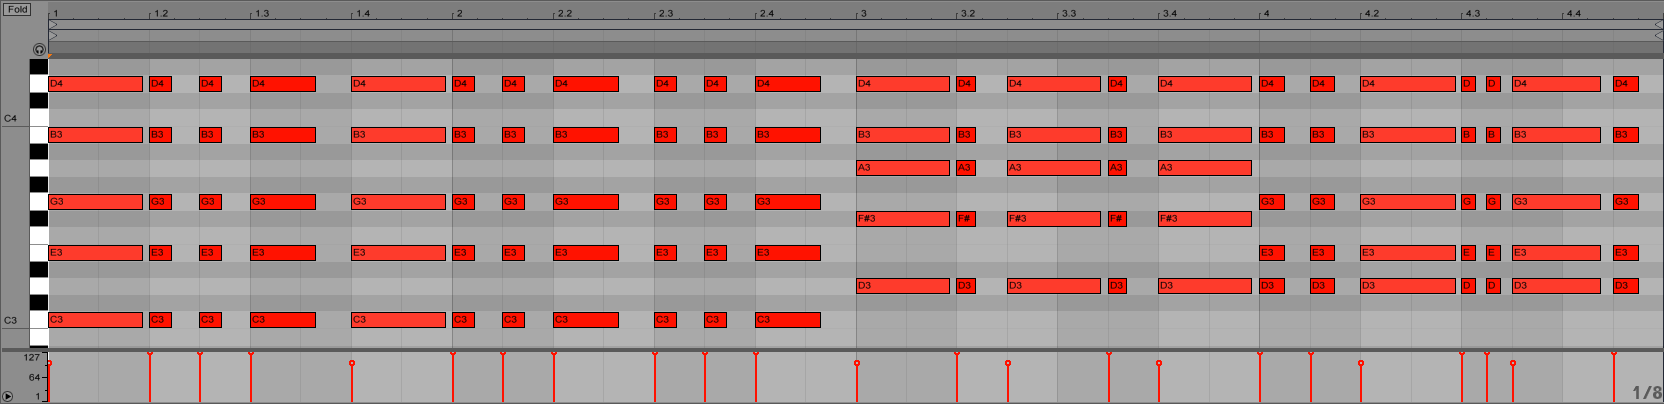
Finally, we’ve made a dynamic melody by chopping up the harmony parts:
and added EQ8 to remove unnecessary low end from the section:
It sounds good, but we decided to add another track with the same pattern, but different, open-sounding preset. This layer adds more weight and fullness to the melody.
STEP 08 – Stab
For the Stab, we used our first chord and removed any unnecessary low frequencies by using EQ8.
STEP 09 – Melody
We’re not going to waste your time by showing you how to draw out each note – because not only does this makes zero sense, but there are no such tricks for this like we used on the chords. For this particular melody, we simply sang (hummed) a few ideas and recreated the best one by drawing it out note-by-note. If you’re not familiar with music theory, you can simply sing your melody, use the Audio To MIDI feature – and then tweak it to perfection.
Here is how it sounds:
We also layered it with a sharp sounding preset to add some bright character and make it stand out in the mix.
STEP 10 – ARP
We’ve added an arpeggiated synth track to bring more variety and movement into the melody. For the ARP track, we used the same harmony as our Chords track – this time, with a slightly different pattern.
Then, we added an Arpeggiator in front of Sylenth1, adjusting its settings to fit the other elements its surrounded by. We also added a PingPong delay to add a bit more space and EQ8 to cut out any unnecessary low frequencies (while also boosting select highs to make it brighter).

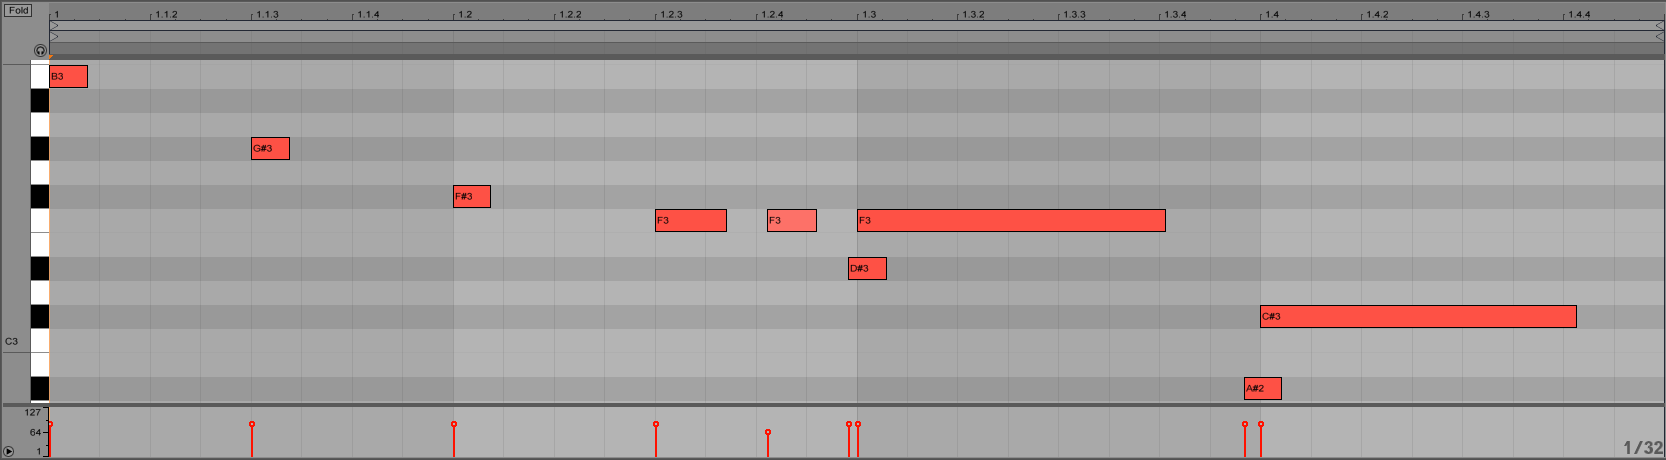
STEP 11 – Background Melody
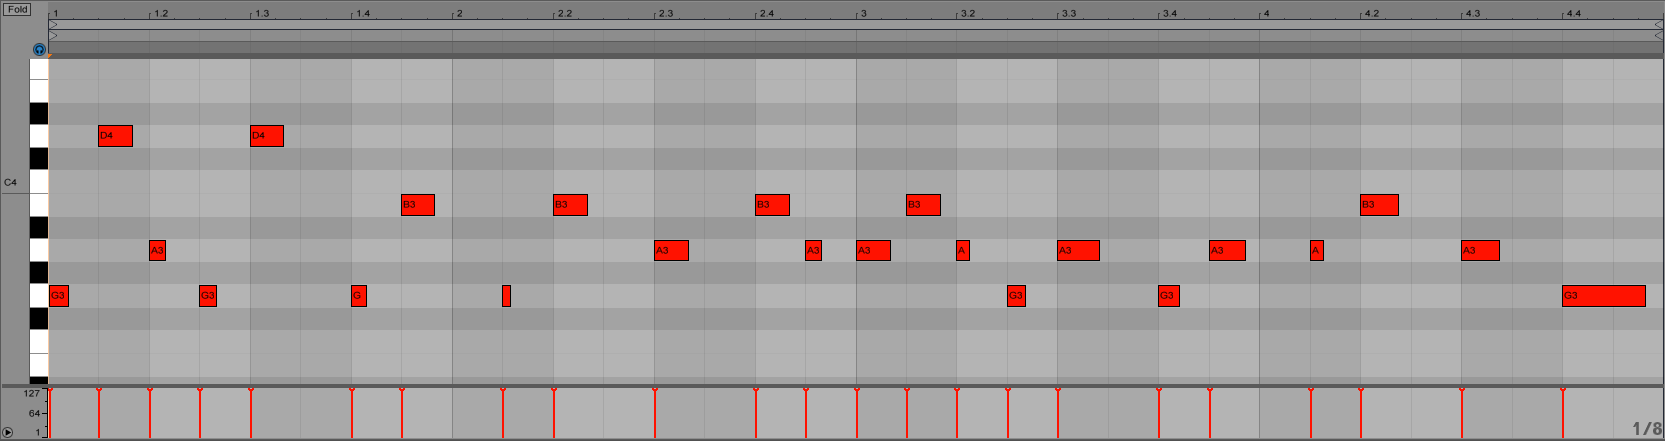
To add some depth, we added one more background melody. As in Step 09 – we sang it and then drew it out, note-by-note.
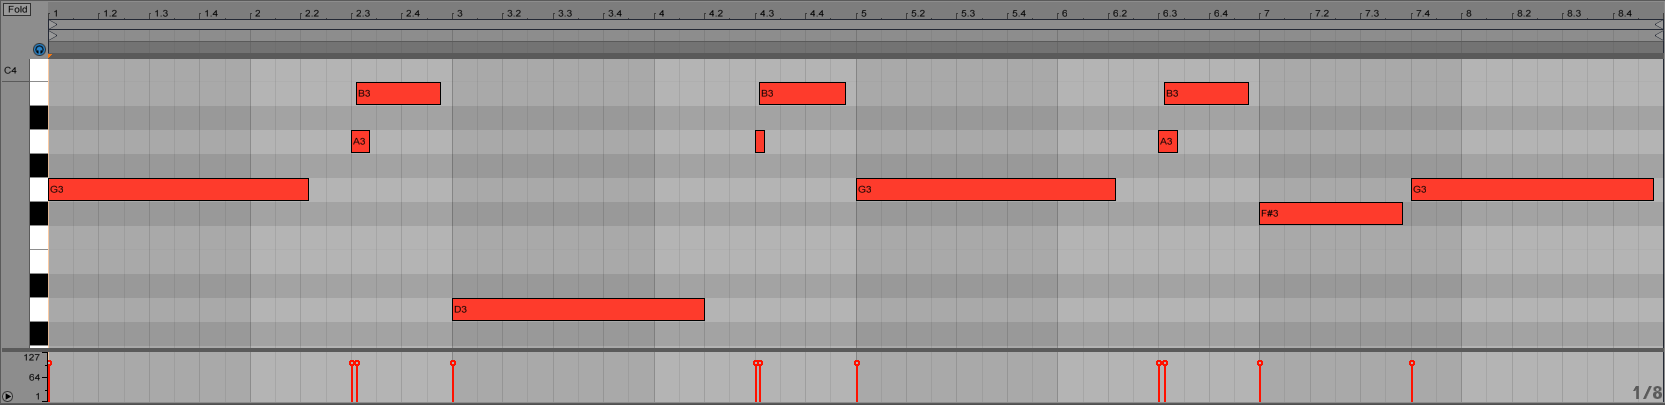
We’d now like to draw your attention to the glide from A to B. This is a very essential detail in Future Bass leads. Basically, by removing all of the A notes – the melody will still sound good, but the glide adds an extra “live” feel. Make sure to play with glide settings whenever using a synth or a sampler.
Here is how that sounds:
By adding some PingPong delay, we’ve introduced some more dimension – while a Reverb with a high Wet setting distances the sound a bit. Then, we added Compressor to glue the synth sound together with some delay and a reverb tail. Finally, we added a sidechain compressor to add a slight “wavey” effect.

Now that all of the main elements are in place – let’s hear the final result:
We hope you enjoyed this tutorial and the trick we did with chords. And make sure to check out our free Future Bass Ableton template “Hideout”.
Thanks for reading!