Mix Tech Series Part 3: Dynamics & Compressors
Theory Basics, Studio Practices And Some ‘Haute Couture’ Free Tools To Check…
Hi there, studio guys’n’gals
For those who’ve already read PARTS 1 & 2 and waiting for more – 3rd Article in #MixingTechniques series just arrived, dedicated to another vital stage of the mixing process on top of the techniques already delivered in previous articles (for those who missed them and willing to have a read – please follow these links: PART 1, PART 2)
To make the reading /navigating a bit more comfy, I’ll be sectioning every Article in this Series as: #INTRO # THEORY BASICS # STUDIO PRACTICIES and #FREE TOOLS TO CHECK
#INTRO
For a long while I’ve been “reading-all-the-tech-you-can-grab“ kind of guy, staying huge of the manuals especially – as apart from solely device-related stuff, you may learn lots of things not related to the piece of gear directly, and I do recommend you to follow this route as far as you can. Plain but true – hours invested in studying the manuals save you days & weeks of mistakes in the studio and tons of nerve – subject of mixing is huge and there is no other way to get it but via theory-practice combo (however much time you plan to allocate to practice).
It may work out in sound design, you may copycat mic placement and tracking setups, but not in mixing. Even going “theory first” way certain some things take lots of time to digest (you may be surprised how long it could be), but don’t let those stop you – grab as much theory as you can and practice regularly, then come back reading and practice again. Mixing is a very complex formula taking lots of time to learn so be patient if learning this skill is important to you.
Compression turned out to be one of the many mix-toughies to me, so I had to read through the hundreds and hundreds of pages and spend tons of time testing and tweaking dozens of commercial and freeware compressors (in addition to Live’s native plugs) before I get the full picture ( I wish The Glue could have been introduced in earlier versions of Live – that would save me lots of time and effort, very capable and great sounding reincarnation of SSL-console bus compressor). So at the end of the day I decided to write down this overview to printscreen my experience and keep it for my students + it will help to cut some corners – so read on if I sparked you interest)
As considered by the majority of studio engineers – EQUALIZATION and COMPRESSION are the most important mixing tools we have at our disposal, so again I do recommend you to invest all the effort you can making sure you got a good understanding of these techniques. Don’t try to grab them all at once though – start with the basics and build your skills as you go (and make sure you checked my “NOTES” below)
#THEORY BASICS:
Wiki delivers some very good explanations, so why don’t we start from there?
Dynamic range compression (DRC or simply “compression”) is a signal processing operation that reduces the volume of loud sounds or amplifies quiet sounds by narrowing or compressing an audio signal’s dynamic range. Audio compression reduces loud sounds above a certain threshold while leaving quiet sounds unaffected.
Universal Audio, one of the gurus, adds:
“The use of compressors can make recordings and live mixes sound more polished by controlling maximum levels and maintaining higher average loudness. Additionally, many compressors — both hardware and software — will have a signature sound that can be used to inject wonderful coloration and tone into otherwise lifeless tracks. Alternately, over-compressing your music can really squeeze the life out of it. For those who are unfamiliar with compressors, having a good grasp of the basics will go a long way toward understanding how compression works…”
A variety of compressor types/designs have been developed through the years to handle for different tasks with some sound far better in certain situations than the others, with an army of more and more sophisticated units popping up regularly on top of that, so I suggest to start with grouping them by:
FUNCTION
Depending on the design, compressors can perform (but not limited to):
Downward compression (reduces loud sounds over a certain threshold while quiet sounds remain unaffected) and Upward compression (increases the loudness of sounds below a certain threshold while leaving louder sounds unaffected, both downward and upward compression reduce the dynamic range of a signal)
Expansion (the opposite function, increasing the dynamic range of the audio signal, expanders are generally used to make quiet sounds even quieter by reducing the level of an audio signal that falls below a set threshold level), Noise Gates being a great example.
DESIGN
The signal entering a compressor is split, one copy sent to a variable-gain amplifier and the other to a side-chain where a circuit controlled by the signal level applies the required gain to an amplifier stage. This design, known as a “feed-forward” type, is used today in most compressors. Earlier designs were based on a “feedback” layout where the signal feeding the control circuit was taken after the amplifier.
Live 8 Compressor emulated both FB and FF designs, more on that in “Studio Practices”
CLASS
Can’t stand quoting Barry Rudolph’s fantastic “Understanding Audio Compressors and Audio Compression” study here:
“Most full-featured modern compressors can be set to emulate three CLASSES of compressors: regular compressors, peak limiters and leveling amplifiers that differ primarily in attack, release, ratio and threshold settings”
REGULAR COMPRESSORS
Though there are no rules and many exceptions, for most music recording engineers tend to use a regular compressor with medium attack and release settings. Most of the time the engineer is looking for a modicum of level control with higher average loudness and some peak protection — and dbx 160SL Compressor does this job nicely.
PEAK LIMITERS
A peak limiter is a compressor with a very fast attack time, medium to fast release time, a high ratio and a high threshold. The task for a peak limiter is to stop or control only the very quick, sudden peak levels that will overload the succeeding audio stage. Manley makes a unit called the Slam that combines a compressor and a peak limiter all in one box.
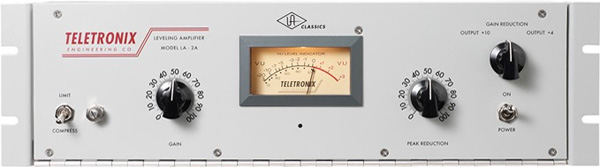
LEVELING AMPLIFIERS
The leveling amplifier is a compressor with a medium attack time, a medium to slow release time, a high ratio and a low threshold. The Universal Audio LA 2A Classic Leveling Amplifier is the classic tube leveling amp.
TYPE
More quotes from the Pro’s (Barry Rudolph again):
VCA COMPRESSORS
“VCA are the most versatile of all and so are the greatest in number. The VCA can quickly change gain in response to many different detectors looking at the same signal. VCA compressors are for the really tough cases where you want strict control over level and dynamics. However, they can be as gentle as any other compressor or anywhere in between. I like a good VCA compressor on vocals, drums, guitars, synths, bass, mix — basically anytime I need a compressor.”

OPTO COMPRESSORS
“Opto, meaning optical, describes the light sensitive circuits that control the compression amount in opto compressors. They often react more slowly than other compressor types, but this can be desirable. The famed Teletronix LA2A is an optical compressor that many producers swear by for vocals and mix bus compression. The LA2A is also a ‘leveling amplifier’ — which means it is working nearly all the time, not just when a threshold is reached. These compressors offer simple, natural sounding control (unless pressed hard)”.
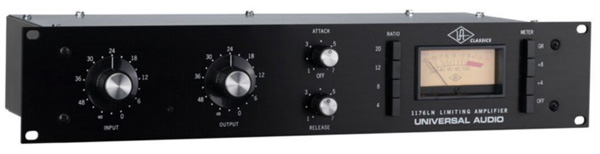
FET COMPRESSORS
“FET compressors are extremely fast, clean and reliable. I like to use these on vocals where a good amount of compression sounds good or better than the same amount with another unit, and on drums for room mics or individual drum mics. Universal Audio’s 1176LN Solid State Peak Limiting Amplifier and LA Audio’s Classic II Dual Compressor/Limiter are examples of FET-based compressors”.
Valve Compressors work in one of the three ways described above, but use valves in the amplifier circuit to get that ‘creamy’ sound. The LA2A, which is an opto compressor/leveling amplifier, uses valves.
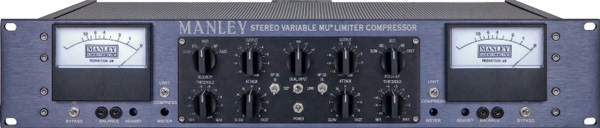
VARI-GAIN COMPRESSORS
“Variable Gain compressors include all units that incorporate discrete circuitry other than VCAs, FETs or opto-isolators. I put the Manley Labs’ Variable-Mu tube unit in this category, and I like using these types for vocals, drums and stereo mix.”
DIGITAL COMPRESSORS
Compressors we use in our DAWs could be either replicas of the existing units or their improved/modified/simplified versions or sophisticated multifunctional hybrids delivering options unparalleled in hardware. These are the tools you will be using daily converting your theoretical knowledge into one of the following techniques:
- Peak & RMS, Channel & Group Compression
- Serial & Parallel (or New York) Compression
- De-Essing, Noise Gating
- Multiband Compression, Master Bus Compression & Limiting (if you decide to learn Basic Mastering techniques one day)
- with-all-time-favorite – Side-Chain Compression sitting on top of all that (I would vote for Side-Chain Gating though)) Just to mention — a couple of months ago I’ve compiled “The Ultimate Guide To Sidechain Compression” that already reached 2300 shares.
I assume you are familiar with with general GUI elements and functions, so I won’t be touching that (WIKI delivers pretty decent explanations on that so you may start there if needed).
# SOME STUDIO PRACTICES THAT WORK
Again and again — stability of your DAW should be a top priority, be it you thinking of doing studio tasks exclusively or preparing to go LIVE in the future in both cases your setup stability is a must. Believe the guy still keeping more than 300 letters from/to Ableton Headquarters tech staff in his inbox, and surviving dozens and dozens of crashes through the years, and yep, all that with a legit OS, drivers, DAW & plugins.
What did I figure out at the end? Well… in ca. 80% of the cases the crashes have been caused by 3rd party plugins, both free and commercial grades. And to get rid of that bloody habbit took me… LOTS of time and effort (now I’m fighting “Sound Designer Rush” as more n more good stuff is falling over). Thus… Beware!
Having said all that, I do recommend you to use Live’s wide range of native dynamic tools as much as you can, especially when tons of goodies added in version 9.0. Read on carefully and you be able to allocate Live’s native devices to majority of categories from above.
1. So let’s start with a couple of Ableton Engineers quotes on Live 9 Compressors News:
“To improve Live 9 Compressor further, we sought after the top experts in dynamic range compression — as our goal was to build a great sounding neutral compressor, as a counterpart to the Glue which has a distinct character based on analog model. We asked Josh Reiss, head of Audio Engineering in the Centre for Digital Music at Queen Mary London to first break Live 8’s compressor and then work with us on improving the DSP. Probably the most important improvement apart from the GUI is the “Lin/Log” switch. When set to “Log”, the compression becomes much smoother and transparent. We decided to keep “Linear” as an option simply because there are situations where you want to apply a more brutal compression and hear the compression artifacts like pumping.”
2. Fantastic, greatly emulated SSL-console compressor The Glue (just a bit more sophisticated version costs nifty 99.00 USD at Cytomic). Highly recommend digging it in-and-out!
“How does Ableton’s New Bus Compressor compares with established offerings from Waves and UA? … The Glue sounds more open and has a more defined stereo width — and it certainly provides ‘the glue’ on a variety of instruments. It’s kind of a ‘more of everything’ compressor, and at a great price too!”
– Sound On Sound Magazine, Nov 2010
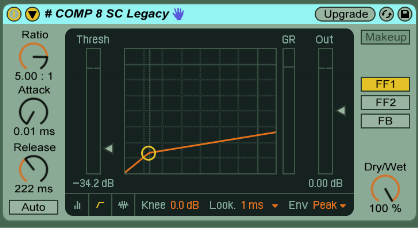
3. Live 8 Legacy Compressor is still awailable, delivering smoother Side-Chain Compression (FF2 mode) especially at extremely short attack settings. Apart from that its OPTO/FB Modes work nicely on vocals to name a thing. (I can attach it to the bottom of the post, just don’t click its Upgrade button)
4. Graham Cochraine from The Recording Revolution points out 3 cases he’s using compressors most often for and I just wouldn’t figure it out better:
Compress To Control Volume (= fight volume fluctuations)
Have vocals on your track? Then without question you have inconsistent volume as the simple switch from a consonant to a vowel will give you widely different volumes.
Compress To Fatten Up (= extend the sustain)
A second reason I reach for compression in every mix is to fatten something up. By going for a faster attack on your compressor you can clamp down on the transients a bit more, thereby letting you bring up the gain of the tail or sustain of the track.
Compress To Create Energy (= putting sounds in-da-face)
Whereas to fatten things up we chose a fast attack time, I like to go for a slower attack time to let more transients come through so I can bring out those peaks a bit more (think acoustic guitar or other kinda-percussive elements). Because of something called the “attack principle” our ears pick up on these tracks a bit more and we perceive them as more present. It’s a super simple way to give your mix a lift and bring your tracks more “forward” to the listener.”
5. In the cases with very complex dynamic material — try Serial Compression with two compressors chained in a row — the first one take cares of major volume fluctuations and the next, faster one handling the transient peaks Combination of Live 8 / Live 9 works perfect for the purpose.
6. Another thing to keep in mind — Compress in Series — that is bit different from Serial Compression, as in this case we are talking about Individual/Character compression (e.g. on the snare channel) followed by Drum Buss Comp and followed by Master Bus Compressor. In this case keep an eye on the levels and especially Gain Reduction recovery that should normally happen within a bar.
7. In general — keep VCA / FET compressors for handling PEAKS (esp. in transient based sounds — Drums and Percussion) and OPTO for RMS tasks (e.g. levelling heavy bass lines).
8. If you question yourself in what order you should place your EQs and Compressors — this rule works both on individual channel and group/busses and I recommend it as a starting point:
# SELECTED TOP-NOTCH TOOLS I RECOMMEND TRYING
KLANGHELM 1 DC1A
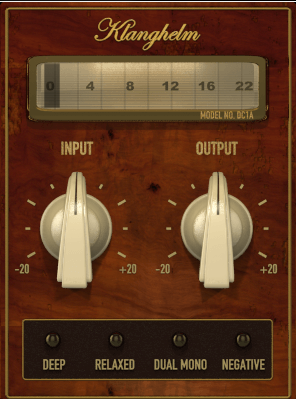
Effortless Character Comp. Just an input and output knob compressor that works: gentle, faithful, from almost invisible, smooth leveling to heavy pumping with a nice crunchy saturation and punchy enough to treat drums with. Download
KLANGHELM MJUC jr.
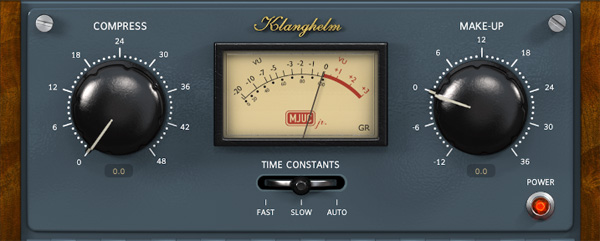
Unique Variable-Tube* Compressor combining very natural, dense compression characteristics of the early days of this type of compression with a more forward sounding approach and more harmonics creating of the variable-mu comps of the early 1960s. Capable of smooth leveling but also heavy pumping. Download
AUDIODAMAGE: Rough Rider.
The Beast With A Twist = Twist-Beast
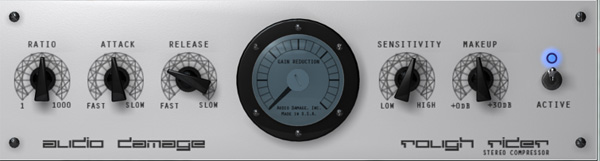
Vintage-compressor for All-Your-Drum-Bus-Compression & Pumping needs, but also try it on synth basslines, clean guitars, back vocals. Download
SSL: LMC-1
A faithful recreation of the Listen Mic Compressor from SSL’s legendary “E”-Series consoles. True Rarity. Have a read about its story and try it on drums. Download
XFER RECORDS: OTT
Re-creation of a popular aggressive multiband upwards/downwards compressor used by many dubstep and electro producers. Simple yet functional GUI. Download
In Session: “Xfer Records OTT sounds amazing on the master channel strip. We put an instance of it right before the limiter, adjusted the OUT GAIN a bit, and were instantly satisfied by how it made the track pump and growl nicely.”
Learn them well, however hard it may look first, and you get a good chance to break them later.
Thus… Walk. And Ye Shall Reach.
Written by: Andrey Romanenko (Kiev, Ukraine)
2016 @ Copyright. All Rights Reserved